Android (액티비티 생명주기, 로그캣, 액티비티 테스트, 안드로이드 4대 구성요소, 디자인탭 활용, 액티비티와 프래그먼트)
1. 액티비티 생명주기
- 액티비티 생성부터 소멸까지의 주기를 말함
2. 로그캣
- Log.d : 디버깅 용도로 남기는 로그
- Log.e : 가장 심각한 오류 발생 시 남기는 로그
- Log.i : 정보를 남기기 위한 로그
- Log.v : 상세한 기록을 남기기 위한 로그
- Log.w : 경고 수준을 남기기 위한 로그
3. 액티비티 테스트
- 프로젝트 새로 생성
<?xml version="1.0" encoding="utf-8"?>
<LinearLayout xmlns:android="http://schemas.android.com/apk/res/android"
    xmlns:app="http://schemas.android.com/apk/res-auto"
    xmlns:tools="http://schemas.android.com/tools"
    android:layout_width="match_parent"
    android:layout_height="match_parent"
    android:orientation="vertical"
    tools:context=".MainActivity">

    <Button
        android:layout_width="match_parent"
        android:layout_height="wrap_content"
        android:id="@+id/btnDial"
        android:text="전화걸기"/>

    <Button
        android:layout_width="match_parent"
        android:layout_height="wrap_content"
        android:id="@+id/btnFinish"
        android:text="끝내기"/>

</LinearLayout>
- XML
package kr.jeongmo.a0509_project_01

import android.content.Intent
import android.net.Uri
import androidx.appcompat.app.AppCompatActivity
import android.os.Bundle
import android.util.Log
import android.widget.Button

class MainActivity : AppCompatActivity() {
    override fun onCreate(savedInstanceState: Bundle?) {
        super.onCreate(savedInstanceState)
        setContentView(R.layout.activity_main)

        title = "액티비티 테스트 예제"
        Log.i("액티비티 테스트", "onCreate()")

        val btnDial = findViewById<Button>(R.id.btnDial)
        btnDial.setOnClickListener {
            val uri = Uri.parse("tel: 010-1234-5678")
            startActivity(Intent(Intent.ACTION_DIAL, uri))
        }

        val btnFinish = findViewById<Button>(R.id.btnFinish)
        btnFinish.setOnClickListener {
            finish()
        }

    }
}
- Activity 파일
package kr.jeongmo.a0509_project_01

import android.content.Intent
import android.net.Uri
import androidx.appcompat.app.AppCompatActivity
import android.os.Bundle
import android.util.Log
import android.widget.Button

class MainActivity : AppCompatActivity() {
    override fun onCreate(savedInstanceState: Bundle?) {
        super.onCreate(savedInstanceState)
        setContentView(R.layout.activity_main)

        title = "액티비티 테스트 예제"
        Log.i("액티비티 테스트", "onCreate()")

        val btnDial = findViewById<Button>(R.id.btnDial)
        btnDial.setOnClickListener {
            val uri = Uri.parse("tel: 010-1234-5678")
            startActivity(Intent(Intent.ACTION_DIAL, uri))
        }

        val btnFinish = findViewById<Button>(R.id.btnFinish)
        btnFinish.setOnClickListener {
            finish()
        }
    }

    override fun onDestroy() {
        super.onDestroy()
        Log.i("액티비티 테스트", "onDestroy()")
    }

    override fun onPause() {
        super.onPause()
        Log.i("액티비티 테스트", "onPause()")
    }

    override fun onRestart() {
        super.onRestart()
        Log.i("액티비티 테스트", "onRestart()")
    }

    override fun onResume() {
        super.onResume()
        Log.i("액티비티 테스트", "onResume()")
    }

    override fun onStop() {
        super.onStop()
        Log.i("액티비티 테스트", "onStop()")
    }
}
- Ctrl + O 단축키를 통해서 override 코드 추가
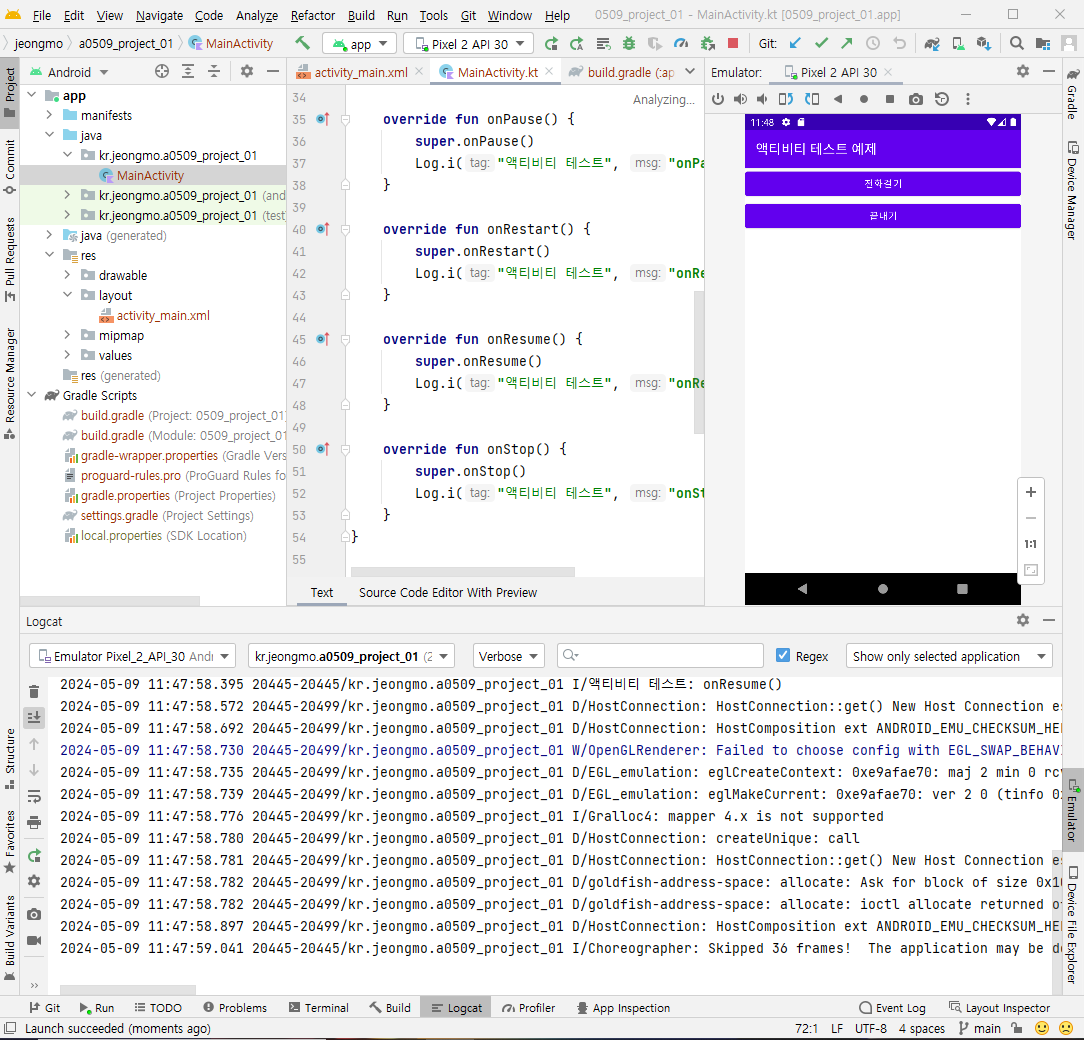
- 프로젝트 실행 및 결과 확인


- 태그 네임을 검색 필터 설정하여, 기능 실행 하며 로그 확인
4. 안드로이드 4대 구성요소
- 액티비티 : 사용자에게 사용자 인터페이스를 제공
- 서비스 : 백그라운드 조작을 수행
- 브로드캐스트 리시버 : 앱의 밖에서 일어난 이벤트를 앱에 전달
- 콘텐트 프로바이더 : 데이터를 관리하고 다른 앱의 데이터를 사용할 수 있게 함
- 액티비티 생명주기
- 앱은 1) 생성된 상태, 2) 시작된 상태, 3) 재게된 상태, 4) 일시정지된 상태, 5) 멈춰진 상태, 6) 종료된 상태가 있음
- onPause() : 사용자가 액티비티를 떠나는 경우 처음 실행되는 콜백 함수
- onStop() : 액티비티가 사용자에게 더 이상 표시 안 되는 중단된 상태에 들어가기 직전에 실행되는 콜백
- onDestory() : 액티비티가 완전히 소멸되기 직전에 호출되는 함수
- 액티비티 간의 화면 전환
- 앱 사용 시 수많은 화면 전환이 일어남
- 화면 전환 = 액티비티 전환
- 여기서 매우 중요한 개념 중 하나가 인텐트 Intent
5. 디자인탭 활용

-메인 xml 디자인탭 활용
- text (helloworld) 삭제
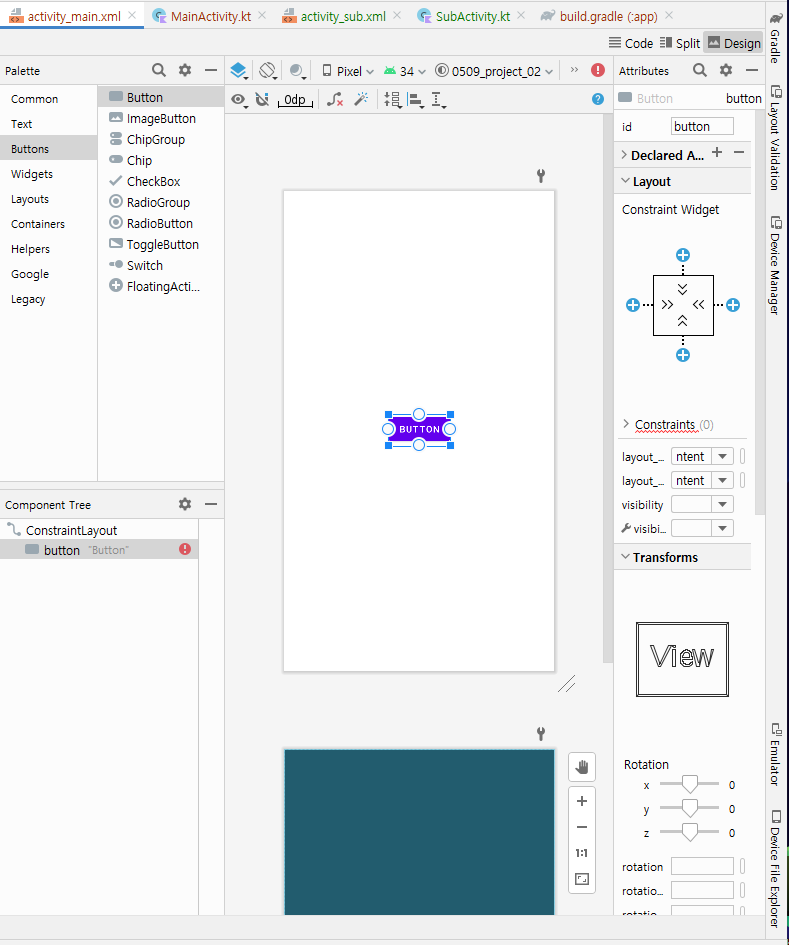
- Button 드래그 해서 추가

- 요술봉 아이콘 클릭 > 제약이 자동으로 적용된다.
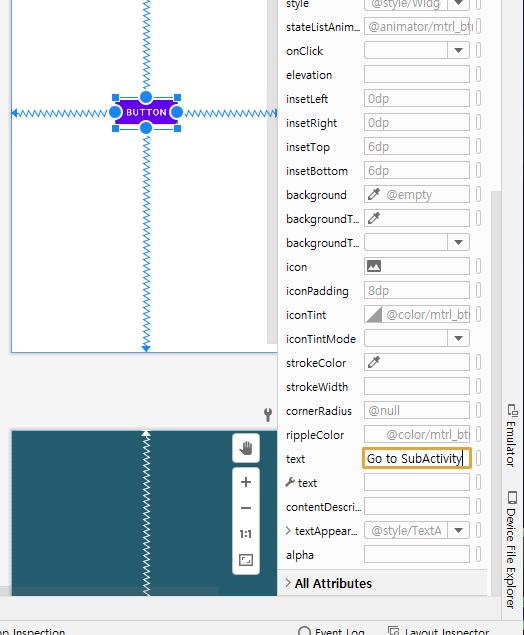
- 오른쪽 Attibutes 탭에서 버튼 Text 내용 변경
<?xml version="1.0" encoding="utf-8"?>
<androidx.constraintlayout.widget.ConstraintLayout xmlns:android="http://schemas.android.com/apk/res/android"
    xmlns:app="http://schemas.android.com/apk/res-auto"
    xmlns:tools="http://schemas.android.com/tools"
    android:layout_width="match_parent"
    android:layout_height="match_parent"
    tools:context=".MainActivity">

    <Button
        android:id="@+id/button"
        android:layout_width="wrap_content"
        android:layout_height="wrap_content"
        android:text="Go to SubActivity"
        app:layout_constraintBottom_toBottomOf="parent"
        app:layout_constraintEnd_toEndOf="parent"
        app:layout_constraintStart_toStartOf="parent"
        app:layout_constraintTop_toTopOf="parent" />
</androidx.constraintlayout.widget.ConstraintLayout>
- XML 코드도 자동으로 변경
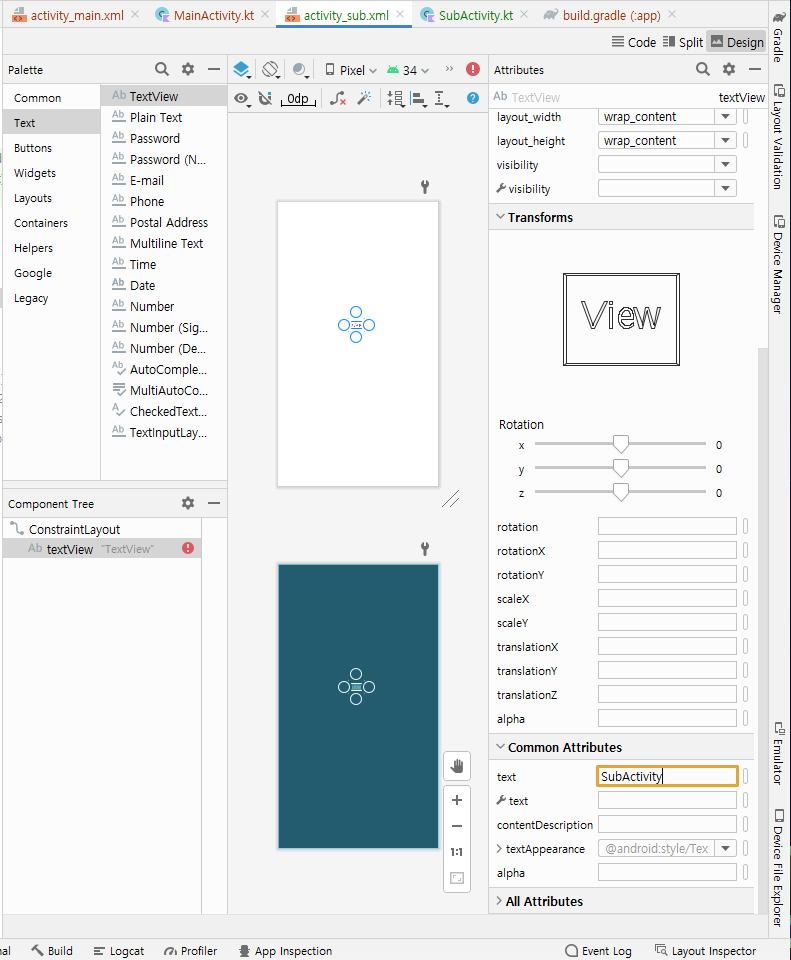
- activity_sub.xml에 Textview 추가 후 > text 변경
<?xml version="1.0" encoding="utf-8"?>
<androidx.constraintlayout.widget.ConstraintLayout xmlns:android="http://schemas.android.com/apk/res/android"
    xmlns:app="http://schemas.android.com/apk/res-auto"
    xmlns:tools="http://schemas.android.com/tools"
    android:layout_width="match_parent"
    android:layout_height="match_parent"
    tools:context=".SubActivity">

    <TextView
        android:id="@+id/textView"
        android:layout_width="wrap_content"
        android:layout_height="wrap_content"
        android:text="SubActivity"
        tools:layout_editor_absoluteX="172dp"
        tools:layout_editor_absoluteY="306dp" />

</androidx.constraintlayout.widget.ConstraintLayout>
- 코드도 자동으로 적용 돼 있음
package kr.jeongmo.a0509_project_02

import android.content.Intent
import androidx.appcompat.app.AppCompatActivity
import android.os.Bundle
import android.widget.Button

class MainActivity : AppCompatActivity() {
    override fun onCreate(savedInstanceState: Bundle?) {
        super.onCreate(savedInstanceState)
        setContentView(R.layout.activity_main)
        settingButton()
    }

    private fun settingButton() {
        val button = findViewById<Button>(R.id.button)
        button.setOnClickListener {
            val intent = Intent(this, SubActivity::class.java)
            startActivity(intent)
        }
    }
}
- 메인 액티비티에 코드 작성
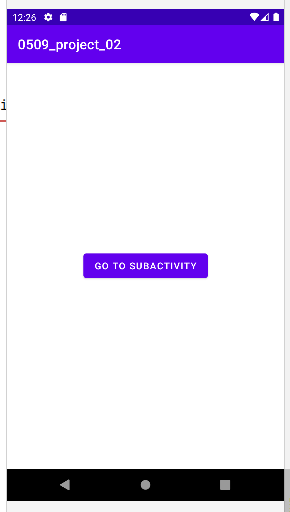
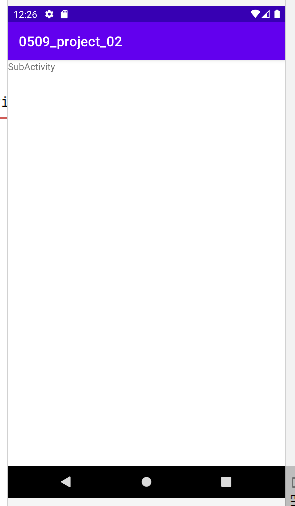
- 실행해서 기능 확인
6. 액티비티와 프래그먼트
- 프래그먼트는 액티비티 안에서 액티비티의 일정 부분을 차지
- 그래서 한 액티비티에 여러 프래그먼트 가능
- 같은 프래그먼트를 여러 액티비티에 가능
- 1) 프래그먼트의 유래
- 프래그먼트 사전적 정의 : 파편, 조각
- 한 화면의 UI를 분할하는데 사용
- 2) 프래그먼트 특징
- 꼭 액티비티 안에 종속되어야 함
- 액티비티의 생명 주기에 영향을 받지만, 프래그먼트 고유의 생명 주기가 존재.
- 액티비티가 실행 중일 때 프래그먼트를 추가하거나 제거할 수 있음
- 3) 프래그먼트 생명 주기
- 액티비티와 유사한 부분이 있고, 다른 부분도 있음
- 프로젝트 새로 생성
<?xml version="1.0" encoding="utf-8"?>
<androidx.constraintlayout.widget.ConstraintLayout xmlns:android="http://schemas.android.com/apk/res/android"
    xmlns:app="http://schemas.android.com/apk/res-auto"
    xmlns:tools="http://schemas.android.com/tools"
    android:layout_width="match_parent"
    android:layout_height="match_parent"
    tools:context=".MainActivity">

    <FrameLayout
        android:layout_width="match_parent"
        android:layout_height="300dp"
        android:id="@+id/fragmentFrame"
        android:background="#FFEB3B"
        app:layout_constraintTop_toTopOf="parent"
        />

    <Button
        android:layout_width="match_parent"
        android:layout_height="wrap_content"
        android:id="@+id/buttonRedFragment"
        android:layout_margin="10dp"
        android:text="Red Fragment"
        app:layout_constraintBottom_toBottomOf="parent"/>

    <Button
        android:layout_width="match_parent"
        android:layout_height="wrap_content"
        android:id="@+id/buttonBluePragment"
        android:layout_margin="10dp"
        android:text="Blue Fragment"
        app:layout_constraintBottom_toTopOf="@+id/buttonRedFragment"/>


</androidx.constraintlayout.widget.ConstraintLayout>
- XML 작성

- 액티비티 폴더에 클래스 파일 생성

- RedFragment로 이름 설정 후 추가
package kr.jeongmo.a0509_project_02

import androidx.fragment.app.Fragment

class RedFragment : Fragment() {
}
- 코드 작성
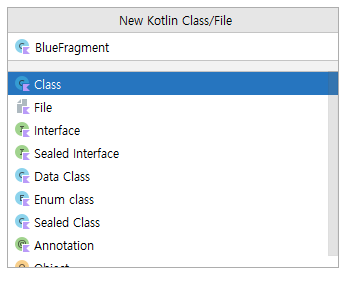
- BlueFragment도 동일하게 생성
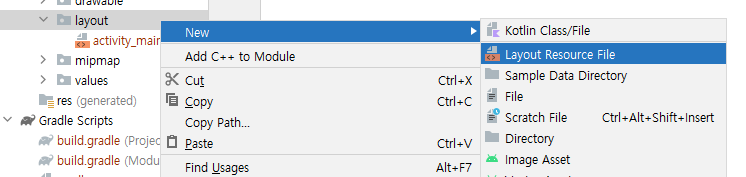
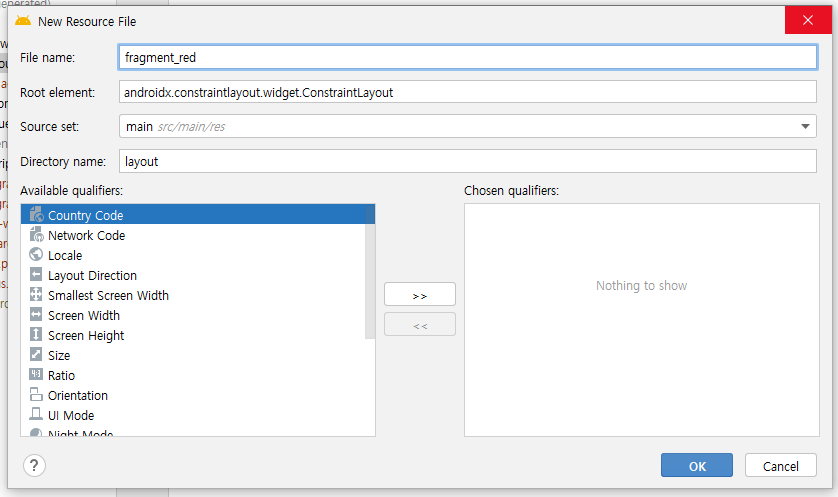
- 레이아웃 XML 파일도 추가

- fragment_blue도 추가
<?xml version="1.0" encoding="utf-8"?>
<androidx.constraintlayout.widget.ConstraintLayout xmlns:android="http://schemas.android.com/apk/res/android"
    android:background="#0000FF"
    android:layout_width="match_parent"
    android:layout_height="match_parent">

</androidx.constraintlayout.widget.ConstraintLayout>
- XML 작성
package kr.jeongmo.a0509_project_02

import android.os.Bundle
import android.view.LayoutInflater
import android.view.View
import android.view.ViewGroup
import androidx.fragment.app.Fragment

class RedFragment : Fragment() {
    override fun onCreateView(
        inflater: LayoutInflater, // 뷰를 생성하는 객체
        container: ViewGroup?, // 생성할 뷰(자식 뷰)가 들어갈 부모 뷰
        savedInstanceState: Bundle? // 이전 프래그먼트 객체에서 전달된 데이터(번들)
    ): View? {
        return inflater.inflate(R.layout.fragment_red, container, false)
    }
}
- RedFragment 액티비티 작성
package kr.jeongmo.a0509_project_02

import android.os.Bundle
import android.view.LayoutInflater
import android.view.View
import android.view.ViewGroup
import androidx.fragment.app.Fragment

class BlueFragment : Fragment() {
    override fun onCreateView(
        inflater: LayoutInflater, // 뷰를 생성하는 객체
        container: ViewGroup?, // 생성할 뷰(자식 뷰)가 들어갈 부모 뷰
        savedInstanceState: Bundle? // 이전 프래그먼트 객체에서 전달된 데이터(번들)
    ): View? {
        return inflater.inflate(R.layout.fragment_blue, container, false)
    }
}
- BlueFragment 액티비티 작성
package kr.jeongmo.a0509_project_02

import android.content.Intent
import androidx.appcompat.app.AppCompatActivity
import android.os.Bundle
import android.widget.Button

class MainActivity : AppCompatActivity() {
    override fun onCreate(savedInstanceState: Bundle?) {
        super.onCreate(savedInstanceState)
        setContentView(R.layout.activity_main)
        setButton()
    }

    private fun setButton() {
        val redButton = findViewById<Button>(R.id.buttonRedFragment)
        val blueButton = findViewById<Button>(R.id.buttonBluePragment)

        redButton.setOnClickListener {
            val fragmentTransaction = supportFragmentManager.beginTransaction()
            fragmentTransaction.replace(R.id.fragmentFrame, RedFragment())
            fragmentTransaction.commit()
        }

        blueButton.setOnClickListener {
            val fragmentTransaction = supportFragmentManager.beginTransaction()
            fragmentTransaction.replace(R.id.fragmentFrame, BlueFragment())
            fragmentTransaction.commit()
        }
    }
}
- 메인 액티비티 코드 작성


- 프로젝트 실행해서 버튼 클릭하며 색 변경 확인
공부 과정을 정리한 것이라 내용이 부족할 수 있습니다.
부족한 내용은 추가 자료들로 보충해주시면 좋을 것 같습니다.
읽어주셔서 감사합니다 :)